The Dry-In Stage of Home Construction
The dry-in stage is one of the most important points in the home-building process. It is when the structure transitions from exposed framing to a protected shell that can handle Central Texas weather. Once the home is dried-in, interior work can begin without the risk of rain or moisture damaging lumber, wiring, insulation, or mechanical systems.
This stage happens immediately after framing and includes installing roof sheathing, applying the weather-resistant barrier, setting windows and exterior doors, and completing all required flashing. Each component works together to keep water out while still letting the structure breathe.
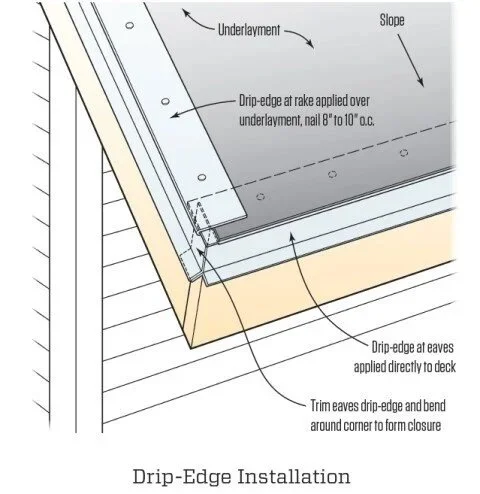
Roof sheathing is the first major step. Most Central Texas homes use plywood or oriented strand board that is secured directly to the rafters or trusses. Proper spacing is important because our hot summers cause expansion. Once the sheathing is fastened, a roofing underlayment is applied to create the first true layer of weather protection. Many builders in the region rely on synthetic underlayment because it holds up better under sun exposure and resists tearing during high winds that often accompany our thunderstorms.
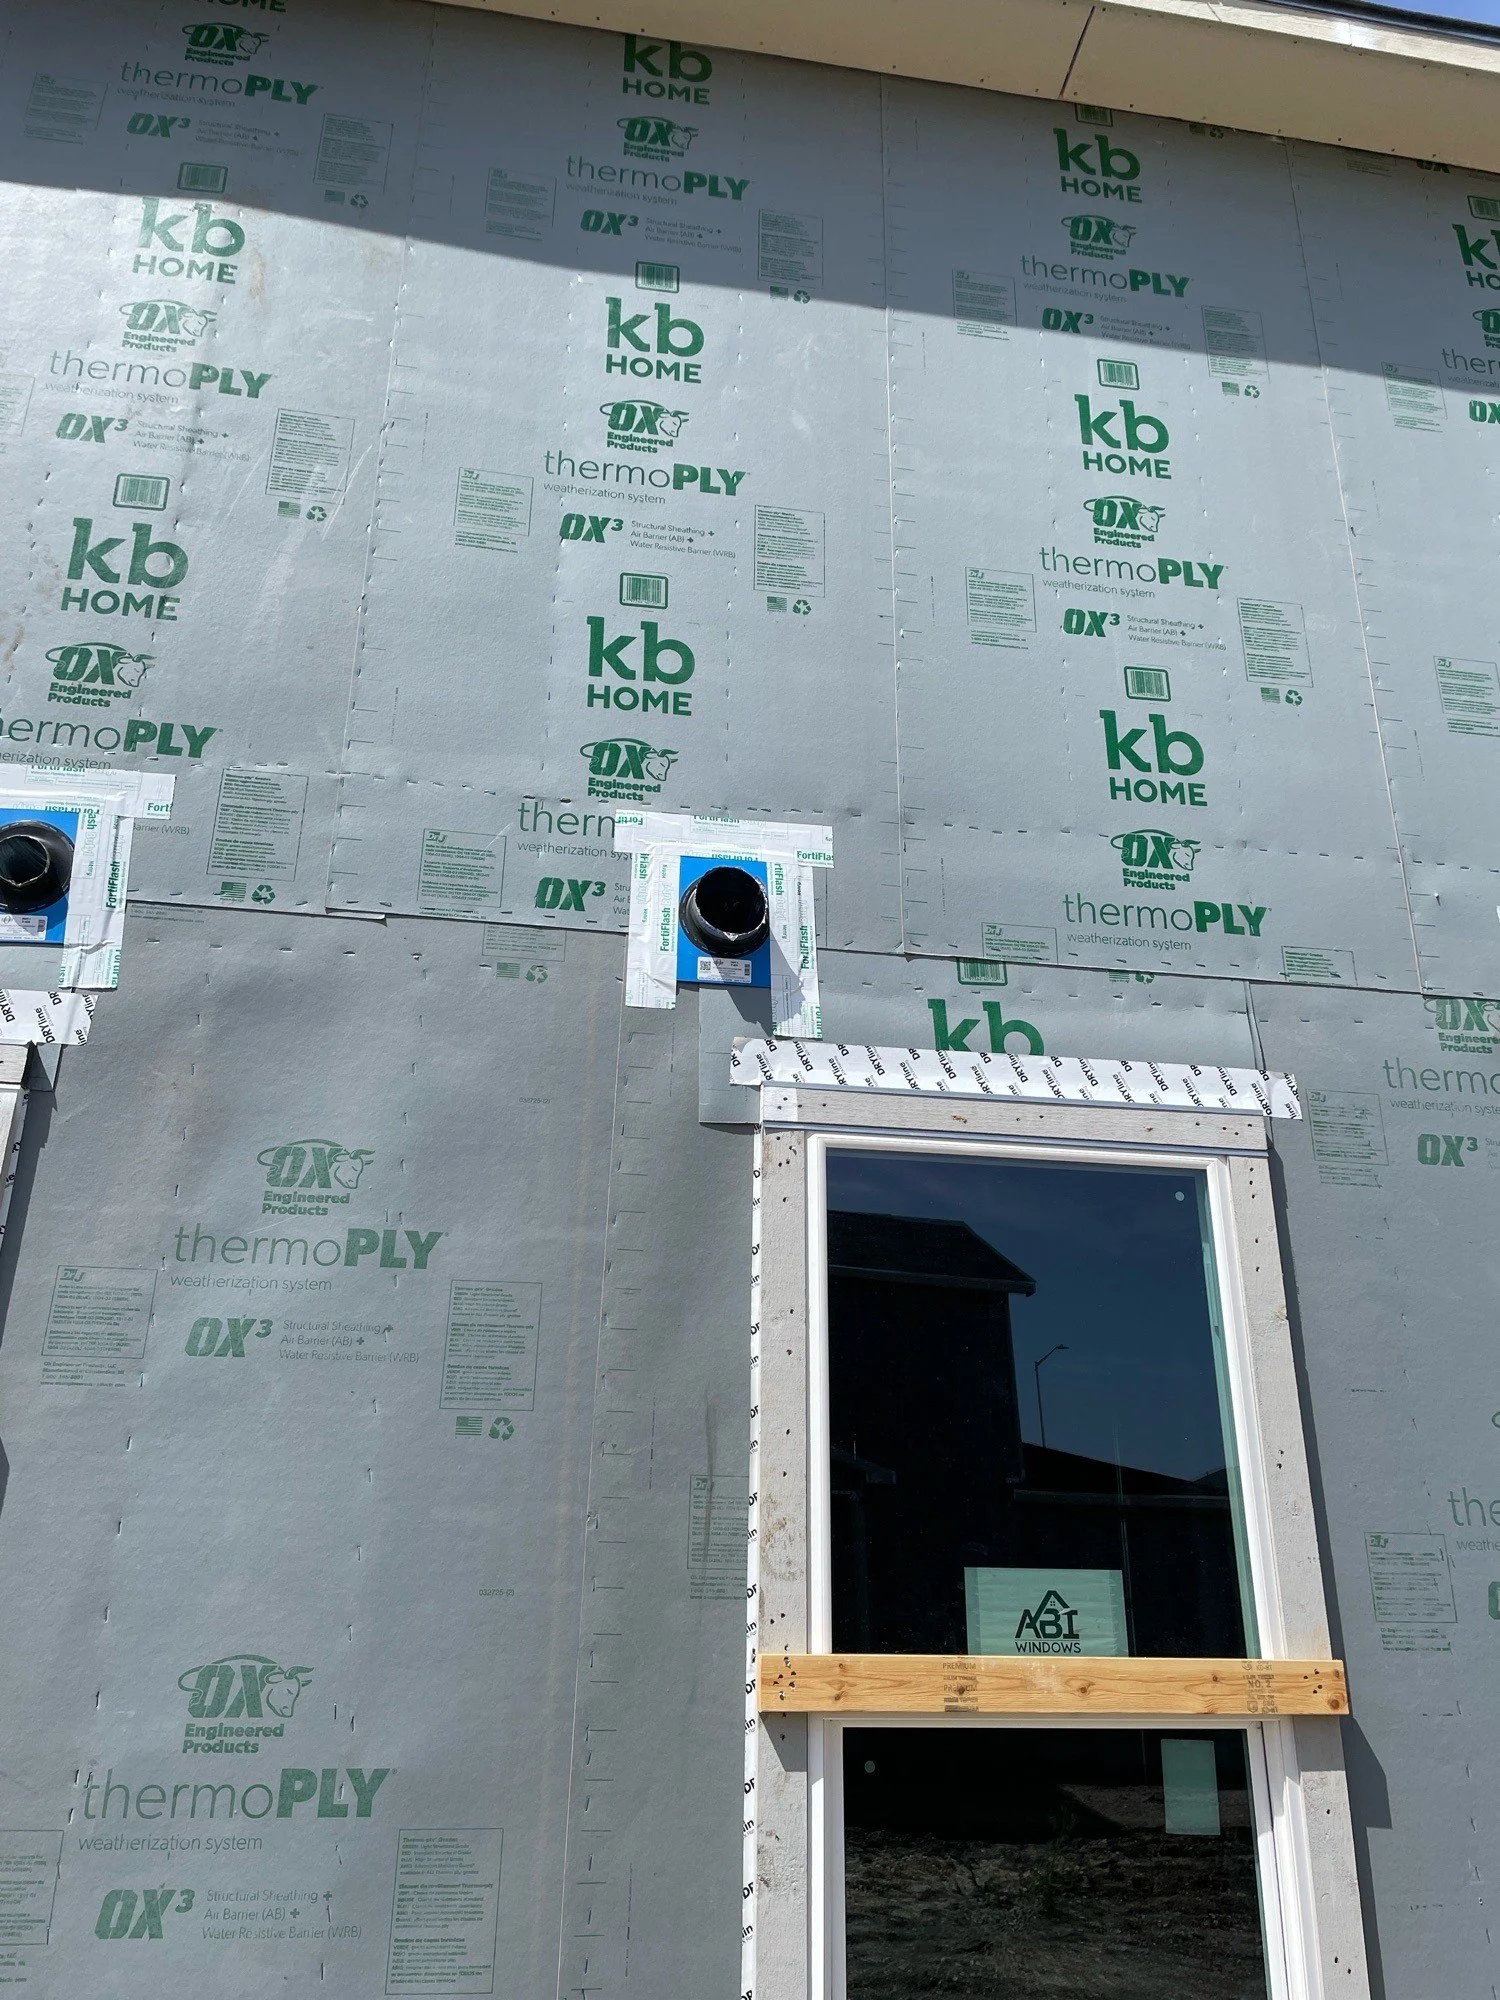
After the roof deck is covered, the focus moves to the exterior walls. The weather-resistant barrier, or WRB, wraps the entire home to protect it from wind-driven rain. At the same time, it allows moisture within the wall cavity to escape, which is essential in our shifting humidity levels. A properly installed WRB is smooth, tight to the framing, and sealed with tape at all seams. This prevents water from slipping behind the barrier and ensures that everything drains downward, which is the natural path water should follow.
Windows and exterior doors follow next. These openings are some of the most common places for moisture to sneak into a home, especially during our sudden Central Texas downpours. Installers must set each unit level and square so it closes tightly and seals well. The installation also relies on a layering method that channels water outward. This includes a sill pan or flashing tape at the bottom, followed by side flashing, and then a top head flashing to finish the sequence. Each layer overlaps the one below it so water is never allowed to travel inward.
This approach brings us to one of the most important parts of the dry-in process: flashing. Flashing includes tapes, sealants, and metal pieces placed anywhere water might enter, including roof valleys, door thresholds, and pipe penetrations. In Central Texas, flashing must be layered in a shingle-like fashion. This means every upper layer overlaps the one below it, just like roof shingles. When water hits these layers, gravity naturally directs it down and out of the structure. If flashing is layered incorrectly, water can be driven inside the building, leading to rot, mold, or hidden long-term damage. Good flashing is one of the best defenses against all of these issues.
Once the roof underlayment is installed, the WRB is wrapped and sealed, the windows and doors are in place, and all flashing is completed in the correct shingle-style layers, the home is considered dried-in. At this point, electricians, plumbers, HVAC technicians, and insulation installers can begin their work without exposure to weather. It also protects the framing itself from unnecessary moisture, reducing the risk of warping or movement later.
Because of our combination of sun, heat, humidity, and strong storms, Central Texas homes rely heavily on the quality of the dry-in stage. A home that is sealed properly now will stay dry, efficient, and structurally sound long after construction is finished. If you are building or planning to build, this is a stage worth understanding and checking closely.
If you have questions or want guidance through your own building process, contact us today. We are here to help.